
Matching a New Gate to Walls and Piers You're Keeping
Match a new bespoke gate to the walls, piers and fence you keep. Rules of thumb for pier centres, coping and finish, plus the England planning check.

Most gates look like additions because they were chosen before the boundary was properly understood. If you are keeping an existing wall, piers or coping, the entrance already has a design language. The right modern electric gate should answer it, not interrupt it. That means working backwards from the boundary: measuring pier centres, clear openings, wall height, coping profile, colour and finish before you settle on a gate design.
This guide explains why a modern electric gate should be designed backwards from the boundary, then walks through what to measure first. You will learn how to check the planning position for your boundary, apply rules of thumb for pier centres and clear openings, match wall height, coping and gate headroom, and choose colour and finish that make a steel electric gate look original. We also cover what to do when the boundary cannot change, how bespoke fabricators shape contemporary gates around fixed dimensions, and how to bring design and automation together. By the end, you will see why sequencing the boundary first, then the gate, is the surest route to an entrance that feels intentional.
Why a Modern Electric Gate Should Be Designed Backwards From the Boundary
The boundary is fixed; the gate is not. Existing walls, piers, coping and fencing already set the sightlines, so a leaf drawn to those dimensions reads as original, while one designed in isolation reads as an addition visible from the road.
Work in one order: measure, confirm the planning position, fix pier centres and clear opening, then choose leaf sizes, infill, finish and automation. Reverse it and compromises arrive late, usually on spacing or headroom. The common failure is buying a catalogue gate first, then moving piers to suit it. Along a terrace or straight fence line, that breaks the run's rhythm.
Older boundaries are hand-built and rarely square. In our experience, variance between pier faces, wall tops and panel centres can run from a few millimetres to several tens. Design for what you find, not a nominal size.
The logic applies to every gate type: a modern electric gate with clean bar infill, a traditional styled metal leaf, or a wider steel electric gate across a commercial entrance. Frame geometry always answers to the piers, as our guide to designing your gates explains.
Where the retained boundary is sound, a bespoke gate built to it is the simplest route to a coherent entrance, rather than rebuilding the boundary around a standard gate. Next, measure the boundary before choosing anything.
What to Measure Before You Choose a Gate
Survey the boundary you are keeping before anything is drawn.
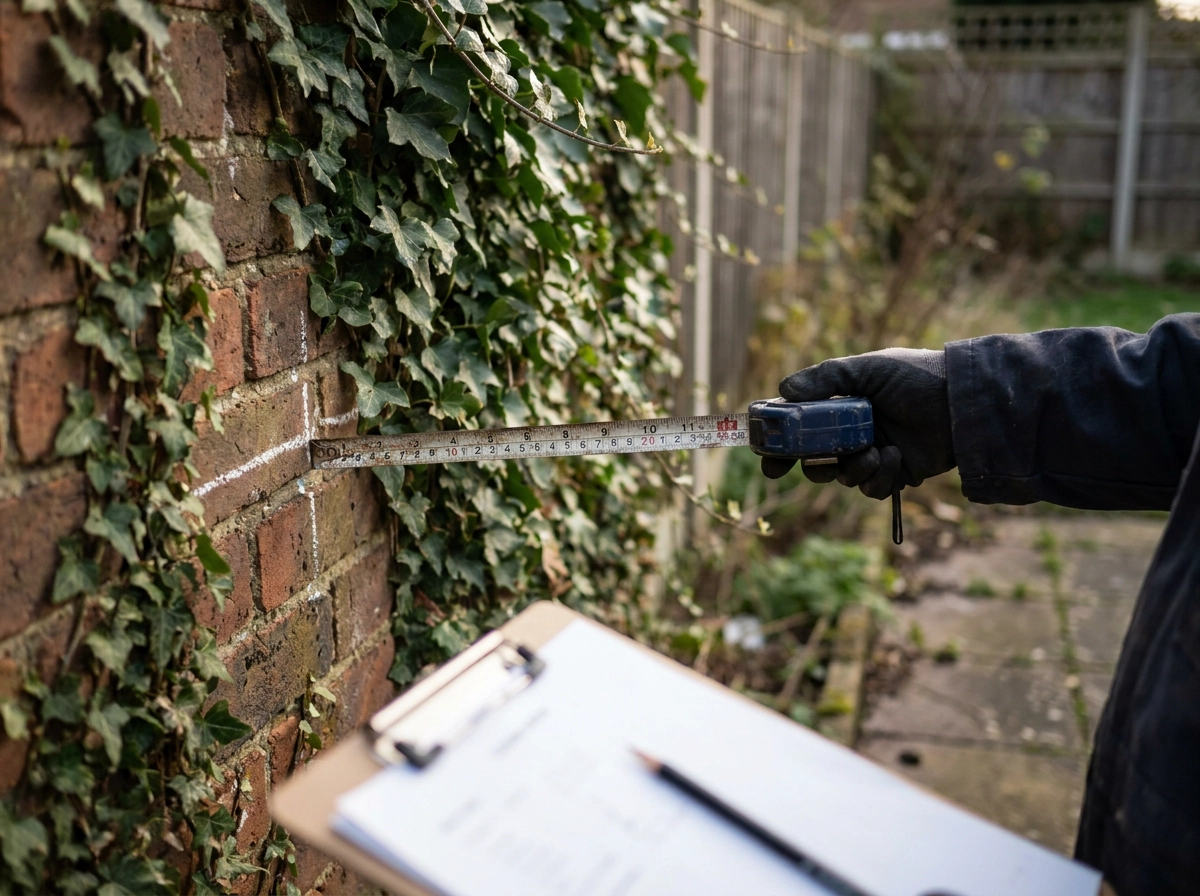
Record pier centres and dimensions first. Centre-to-centre spacing and the clear opening between pier faces are different numbers and both matter. Note each pier's width and depth so hinges, posts or a sliding track can be specified against real bearing surfaces.
Note pier construction and caps: solid brick, facing brick, render or stone, separate stones or cast units. Record cap overhang, because a projecting cap changes usable headroom and the shape of the gate top.
Take wall top heights at the piers, mid-run and where the wall meets the highway. Steps and falls appear only across multiple readings; one reading at the opening tells you nothing about how the gate should sit in the run.
Identify the coping profile, half-round, once-weathered or flat with a drip groove, and measure its projection. This profile usually repeats across new pier caps, so record it before manufacture.
Photograph masonry, pointing, paint, render and existing metalwork in daylight, and note patination. Colour matching is a judgement against today's surface, not the original specification.
Measure across the opening for fall, check kerb and gully positions and where water runs. Slope decides raked tops, ground clearance and whether swing or sliding automation fits. See Reading Your Driveway: The Measurements That Determine Your Options for how these levels shape configuration.
Note highway access, dropped kerbs, existing power, intercom cabling and any gates being replaced, because these route automation and access control.
Check the Planning Position for Your Boundary First
With the boundary measured, settle the planning position before drawings are finalised.
In England, permitted development usually covers a new gate, fence or wall up to 1 metre high where it sits next to a highway used by vehicles, or its footpath, and up to 2 metres elsewhere, according to Planning Portal guidance. Where existing structures already exceed those limits, check with your local planning authority before increasing pier height, even where the new gate alone would sit within the permitted limits. This matters when taller piers are wanted to carry a heavier automated leaf.
The right excludes listed buildings, their curtilage and boundaries adjoining a listed building, and can be removed by an Article 4 direction or planning condition, most often in conservation areas. In conservation areas, permission may be needed even to take down a fence, wall or gate, confirm the position with your local planning authority before any demolition starts. Whether piers count toward those limits is unsettled, so treat new or raised piers as a question for your local planning authority.
The law sits in Class A of Part 2, Schedule 2 of the General Permitted Development Order 2015, amended several times since, so read the operative wording rather than a summary. Scotland and Wales have different caps; do not apply them to an England project. Keep the check early: the outcome can change pier heights, and with them the whole design, including the case for sliding driveway gates.
Rules of Thumb for Pier Centres and Clear Openings
With planning settled, test geometry. These are workshop rules of thumb from our design and fabrication work, not regulation. Confirm dimensions at survey.
A double gate leaf is roughly half the clear opening, less hinge gaps and latch allowance. A single leaf is roughly the full clear opening. If leaves become too wide or heavy for the piers or automation, choose a sliding design or smaller opening rather than thicker hinges. Allow consistent tolerance each side for hinge stiles, locking hardware and automation. A theoretical tight fit binds as hinges settle; a small, deliberate gap is part of matching the piers.
Match gate width to boundary rhythm. Where a wall or fence run divides into regular bays, align pier centres to those bays so the gate reads as one module, not an odd-sized insert. Keep pier centres consistent with the existing pair; moving them outwards to fit a wider gate alters the entrance proportions and is a visible sign of a later addition. On sloped drives, set a level datum from pier tops, not the ground, so the gate head reads straight while bottom clearance is shaped into the leaf. Check the swing or slide envelope before committing: some openings have the pier spacing for a gate but no room behind for a swing, pointing towards a sliding leaf along the existing wall line.
Before fixing leaf sizes, confirm the gate, piers and structure are fit for purpose, since bearing surfaces decide what a leaf can carry.
Matching Wall Height, Coping and Gate Headroom
Set the gate top rail against the coping, not the top of the wall. Aligning it to the bed of the coping, or the underside of a projecting cap, keeps the gate visually inside the wall line rather than standing proud. A top rail that stays true depends on solid alignment hardware, as set out in our guide to Alignment, Track and Structural Tools.
Repeat the coping profile across new pier caps. Half-round, once-weathered and flat with a drip read differently against a gate frame, and a mismatched cap is one of the fastest ways an entrance looks added. Matching the profile means matching the overhang, and carrying the same projection and drip across the piers keeps the shadow line unbroken.
Where a wall drops along the drive, answer with a raked top, a stepped top rail or a level leaf between flanking piers. Follow the coping line, not an isolated preference.
Keep headroom honest. Under a projecting cap or low coping, a taller leaf may fit but not look right, and it may breach the permitted development limits already set out above. Resolve this before the drawing is signed off. Keep new pier caps in proportion to pier and coping; an over-heavy cap breaks the sequence. Settle it at drawing stage, not after fabrication.
Colour and Finish: Making a Steel Electric Gate Look Original
With the coping settled, colour decides whether the gate looks original.
Match to weathered, not new. Existing metalwork has aged, so a fresh powder coat in the nominally identical shade can look sharper beside a part-patinated surface. Decide whether you are matching the original specification or today's finish.
Sample against the masonry. A RAL swatch or coated offcut held in daylight against the brick, render or stone beats any screen. Check both sunlit and shaded sides; colour reads differently across a day.
Read the masonry. Brick, render, stone and pointing all change how a finish is perceived. Assess colour on your boundary, not in a showroom. Substrate choice matters too; our guide to steel, aluminium, hardwood and composite covers it.
Plan the durable route. Powder coating over properly prepared steel is typically considered the durable route for a domestic gate, though specification should suit the specific substrate and environment. Bare or contemporary finishes suit some schemes but need an agreed maintenance plan.
Carry the finish across the hardware. Hinges, handles, locks, posts, guide rails and automation housings share one sightline; a single finish family avoids a frame with assorted parts bolted on.
Tie new stonework to the wall. Keep new pier caps, copings and stone in tone with what remains, and sample the finish against the masonry first. Correcting colour on one panel beats recoating an installed gate.
When the Boundary Cannot Change: Shaping Contemporary Electric Gates Around It
Colour settled, the geometry now answers to the boundary. Where piers stay fixed and the opening is awkward, adapt the gate: unequal leaves, an offset frame or a fabricated infill panel keep the existing centres while letting the entrance work.
On raked ground, custom fabrication can cut a top rail to follow the coping's fall while the bottom rail stays level. A standard gate forced in will foul the ground or leave a wedge-shaped gap at the top.
Where a fence run continues past the gate, matching panel height, rail positions and bar or mesh spacing makes the eye read one continuous band, with the gate simply its moving section.
With no swing room, a sliding gate running behind the existing wall or fence line preserves pier spacing and the coping line untouched. That is often the right answer for a narrow highway frontage; see Is an Electric Sliding Gate Right for Your Property?.
One-off fabrication covers whatever the boundary demands: in-house CNC plasma cutting and bespoke metal fabrication cut decorative and infill panels to the actual opening, so nothing is forced into a standard size. Before committing, revisit the planning check covered earlier, adding height to existing piers still needs authority confirmation.
Bringing Design and Automation Together With a Bespoke Fabricator
With the gate shaped to the boundary, the final step is bringing design and automation together under one fabricator. Portara Automation designs, manufactures, installs and automates bespoke electric gates, working on residential, commercial and agricultural properties.
The process starts with the boundary, not the gate. The boundary survey, pier centres, openings, wall heights and coping profiles, feeds the gate drawing directly.
Automation is specified after the geometry. Swing or sliding choice, hinge positions and clearances follow from the clear opening established at survey.
Access control and intercoms are integrated at the design stage, so entry systems suit the entrance and how you use the drive rather than being retrofitted around a finished gate.
Existing manual gates can be automated or replaced. Where a gate already matches the wall, piers and coping, an automation upgrade is often better than a new gate, and you can see more from Portara Automation on repairs and installations.
In-house custom metal fabrication and CNC plasma cutting cover the one-off components that make a match possible, from infill panels sized to a real opening to raked top rails cut to a specific coping fall.
Conclusion: Sequence the Boundary First, Then the Gate
Sequence decides whether the gate reads as original or an addition. Measure the boundary before shortlisting: pier centres and clear opening, pier dimensions, wall and pier heights, coping profile and projection, ground levels and drive slope.
Check the planning position early, the permitted development thresholds and exclusions set out above apply to piers and copings as well as the gate leaf itself.
Match deliberately, not approximately: repeat the coping profile across new pier caps, align the top rail to the coping bed or cap underside, and test the finish as a physical sample against the masonry and metalwork.
Then let the gate adapt. Unequal leaves, raked top rails, infill panels and sliding operation all preserve an entrance you are keeping. Book a survey with Portara Automation and settle dimensions before fabrication.